Seamless TV DNS switching with dnsmasq and Home Assistant
Some Black Friday ago, I happened to buy a lifetime subscription to Getflix. It’s a service that allows you to bypass Netflix regional restrictions by using their DNS servers. The advantage is that you don’t get stuck with lower speeds as you probably would with a VPN. The service has been working pretty well apart from a few outages some time ago (looks like Netflix is actively working against them) and I use it to watch US Netflix and Prime Video from Italy. I think there are other similar services so this guide will apply to those too.
When I’m on my PC, I use DNS Jumper to switch between Google and Getflix DNS servers. However, when I wanted to watch US Netflix on my LG TV I had to manually change the network configuration, not very comfortable with a remote. I couldn’t either leave the Getflix DNS always configured, as my family wouldn’t want to have English-only flicks nor lose some Italian-only movies Netflix probably offers.
The solution was to use my Raspberry Pi as a DNS server, point the TV to it and integrate a script into Home Assistant so I could manage the whole thing from my phone together with other lights and switches in my house.
The first thing to do is to install dnsmasq, a DNS and DHCP server, on your Pi:
sudo apt-get install dnsmasq
I wasn’t interested on the DHCP part so I haven’t enabled it. By looking at the dnsmasq manual I found some interesting and useful features:
- dnsmasq gets its upstream (i.e. ‘reference’) DNS servers from
/etc/resolv.conf, a file that on my Pi was auto-generated by resolvconf. You can either change resolvconf configuration (via the/etc/resolveconf.conffile) or force dnsmasq to ignore the file and use specific DNS servers. I chose the second option. - dnsmasq caches DNS queries, which is a good thing in general but bad for our use case. By sending a SIGHUP to its process, we can force a cache cleaning.
We will now create two copies of the dnsmasq config file and a very simple script that switches between them.
We need to add (or uncomment) the following lines in the /etc/dnsmasq.conf file:
# ignore the /etc/resolv.conf file
no-resolv

# probably redundant: ignore changes in /etc/resolv.conf
no-poll

listen-address=127.0.0.1
listen-address=YOUR_LAN_IP_ADDRESS
We can now copy the files:
sudo cp /etc/dnsmasq.conf /etc/dnsmasq.nflx.conf
sudo cp /etc/dnsmasq.conf /etc/dnsmasq.goog.conf
Now we force Getflix DNS servers, appending the following to the /etc/dnsmasq.nflx.conf config file:
server=GETFLIX_DNS_SERVER_1
server=GETFLIX_DNS_SERVER_2
We then do the same for the /etc/dnsmasq.goog.conf file:
server=8.8.8.8
server=8.8.4.4
We can now write the script that handles the change between the two files. We touch /home/pi/dnschange and edit it with our favorite text editor.
if [ "$1" = "google" ]; then
        cp /etc/dnsmasq.goog.conf /etc/dnsmasq.conf
        echo "Google DNS servers restored."
fi

if [ "$1" = "netflix" ]; then
        cp /etc/dnsmasq.nflx.conf /etc/dnsmasq.conf
        echo "Getflix DNS set."
fi

systemctl restart dnsmasq.service
killall -s SIGHUP dnsmasq
echo "dnsmasq restarted."
Make the script executable:
chmod +x /home/pi/dnschange
We’re about done. By running sudo /home/pi/dnschange netflix we will be able to watch the US Netflix, and by running sudo /home/pi/dnschange google we will revert back to Google DNS servers.
You can make sure the script is working by running cat /etc/dnsmasq.conf | grep server= and see if the file has the right servers inside.
Still, it would be quite unpractical to SSH into our Pi from the couch and run the two commands. Let’s integrate the thing with Home Assistant so we can easily run the script from our mobile web browser.
Edit the HA config file and add the following lines. For me, it’s in /home/homeassistant/.homeassistant/configuration.yaml:
switch:
  platform: command_line
  switches:
    nflx_unblocker:
      friendly_name: "Netflix US"
      command_on: "sudo /home/pi/dnschange netflix"
      command_off: "sudo /home/pi/dnschange google"
Then, let’s add the homeassistant user to sudoers so it can run the commands as root without asking for a password (make sure your network is secure!), by editing the sudoers file
sudo visudo
and adding the following line:
homeassistant ALL=NOPASSWD: ALL
We can now restart Home Assistant and we should be ready to go.
sudo systemctl restart [email protected]
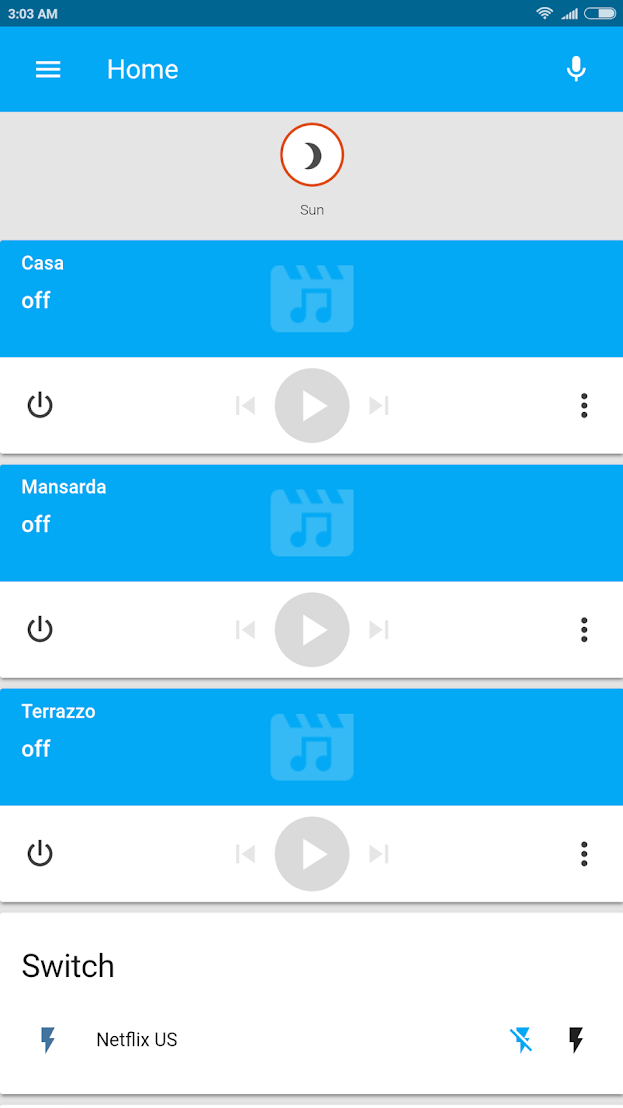
This is how the switch looks on my phone. I’m still a Home Assistant newbie so the interface is a bit bare, but I plan on adding automatic blinds and more lights in the coming weeks.

It’s quite a dirty hack and could be integrated better (e.g. we could make HA verify the DNS change) but it works perfectly for me: the only thing I have to do is kill and re-open the Netflix app on my TV. Happy watching!